Table Of Contents
- Introduction
- Prerequisites
- GitHub OAuth Setup
- Setting Up a Nextjs App
- NextAuth Installation
- Securing App Secrets
- NextAuth Api Route Creation
- Configuring Shared session state
- Basic Signin / Signout Flows
- Page And API Routes Protection
- Conclusion
Introduction
In this walkthrough, we'll be adding GitHub OAuth authentication to a basic serverless nextjs app. This will be more than enough to get you started in Nextjs Authentication.
Prerequisites
- Nodejs
- Basic Javascript knowledge
- GitHub account
GitHub OAuth Setup
To use GitHub authentication, we need a clientId and a secret from GitHub. NextAuth has many built-in OAuth providers, you can find their documentation here .
From the documentations, we're specifically interested in GitHub OAuth . GitHub has an awesome documentation on creating an OAuth app and we'll create one ourselves from which we'll get the clientId and the clientSecret.
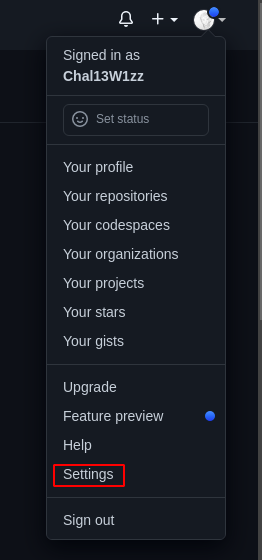
- Go to https://github.com and sign in to your account. Click on your profile photo, then click Settings in the upper-right corner of any page.
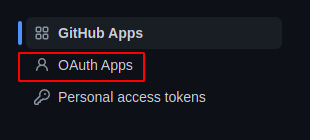
In the left sidebar, click Developer settings.
In the left sidebar, click OAuth Apps.
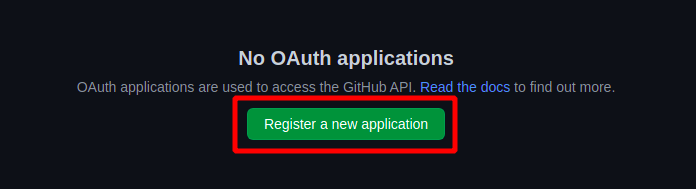
- Click New OAuth App.
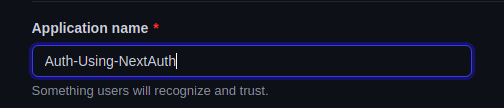
- In "Application name", type the name of your app.
Auth-Using-NextAuthin our case
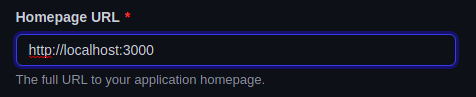
- In "Homepage URL", type the full URL to your app's website. we're using a local development server
http://localhost:3000
- Optionally, in "Application description", type a description of your app that users will see.

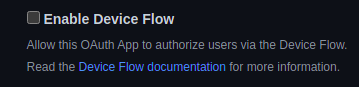
- In "Authorization callback URL", type the callback URL of your app.

- We ignore the last part as we'll be using OAuth on web applications
- Click Register application.
On registering the app, you'll get your Client ID and Client Secrets. Keep this sensitive information secret, like you would a password.
Setting Up a Next.js App
Create a basic nextjs app by using npx create-next-app@latest. This prompts an interactive Next.js app creation interface.

NextAuth Installation
Let's install the nextauth library. To do this, make sure you're in the application's root directory and run
npm install --save next-auth
Securing App Secrets
The clientid, app secrets and other sensitive details might pose as a security threat if exposed to the open public. To prevent this, we store them in an environment variables file that is excluded in the .gitignore file so that it doesn't get pushed to github, this is a good security practice if your code is going to land in a public repository.
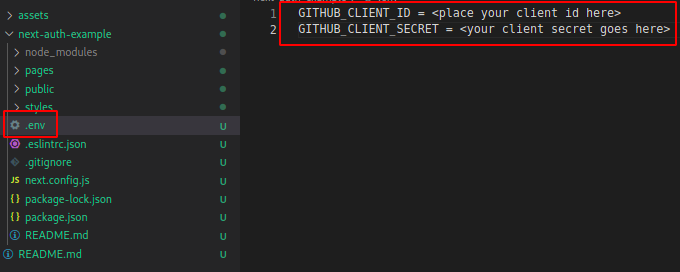
To create the environment variables file, navigate to the app's root directory and create an .env.local file.
Store the clientId and the app secrets in the created file.
You need to restart your server everytime you change anything in the .env.local file to load the secrets.
NextAuth Api Route Creation
Create a file called [...nextauth].js in pages/api/auth. This contains the dynamic route handler for NextAuth.js which will also contain all of your global NextAuth.js configurations.
Add the following to the created file.
pages/api/auth/[...nextauth].js
import NextAuth from "next-auth"
import GithubProvider from "next-auth/providers/github"

export default NextAuth({
  // Configure one or more authentication providers
  providers: [
    GithubProvider({
      clientId: process.env.GITHUB_CLIENT_ID,
      clientSecret: process.env.GITHUB_CLIENT_SECRET,
    }),
    // ...add more providers here
  ],
})
More can be configured in this file but this is the minimum for the default JWT based authentication.
Configuring Shared Session State
To be able to use useSession hook in any page or component in the app, you'll need to expose the session context, <SessionProvider />, at the top level of your application. To do this, open or create pages/_app.js and add the following.
pages/_app.js
import { SessionProvider } from "next-auth/react"

export default function App({
  Component,
  pageProps: { session, ...pageProps },
}) {
  return (
    <SessionProvider session={session}>
      <Component {...pageProps} />
    </SessionProvider>
  )
}
Basic Sign in / out Flows
The NextAuth library has some basic built in signIn/signOut pages which are highly customizable.
To have a look and feel of the built in authentication pages, replace the default index.js
file with this.
index.js
import { useSession, signIn, signOut } from "next-auth/react"

export default function Component() {
  const { data: session } = useSession()
  if (session) {
    return (
      <>
        Signed in as {session.user.email} <br />
        <button onClick={() => signOut()}>Sign out</button>
      </>
    )
  }
  return (
    <>
      Not signed in <br />
      <button onClick={() => signIn()}>Sign in</button>
    </>
  )
}
And with that, we're basically set with GitHub OAuth using NextAuth.js.
Page And API Routes Protection
Page Protection
To show page access restriction, let's create a page post and restrict it's access to only logged in members
To create a page in Next,js, we simply add a component in the pages folder. So, let's create a post component in the pages directory and add the code below.
pages/post.js
export default function post(){
  return (
    <h1>Welcome To The Post Page</h1>
  )
}
To access the post page, simply navigate to http://localhost:3000/post.
You don't have to be logged in to access the post page at this point. To restrict access to only logged in users, we add the following piece of code.
pages/post.js
import { useSession, signIn, signOut } from "next-auth/react";

export default function post(){
    const { data: session } = useSession()

    if (session){
        return(
           <>
            <p>Hello {session.user.name}</p>
            <h1>Welcome To The Post Page</h1>
            <button onClick={() => signOut()}>Sign out</button>
           </>
        )
    } else {
        return(
            <>
            <p>You're not allowed to view this page!</p>
            <button onClick={() => signIn()}>Sign in</button>
            </>
        )
    }

}
API Route Protection
To illustrate API route access protection, we'll use the default api route at http://localhost:3000/api/hello and restrict it's access to only logged in members.
To do this, simply add the following code to pages/api/hello.js
pages/api/hello.js
// Next.js API route support: https://nextjs.org/docs/api-routes/introduction
import { getSession } from "next-auth/react";

export default function handler(req, res) {
  const session = getSession({req})
  if (session) {
    res.status(200).json({ message: 'Access allowed, you can access this content because you are signed in' })
  } else {
    res.status(403).json({ error: 'Access Denied, You must sign in to get access'})
  }
}
Conclusion
Authentication is as simple as that using NextAuth! From here you can easily add additional sign in options by adding more NextAuth providers, all of which is easy to do!